Changelogs
Yontrack helps you generate changelogs for many situations:
- from build to build
- across branches
- from a last promotion etc.
These changes logs can be simple, done at branch level level only between two builds, or recursive down the dependencies of a given project.
Changelogs contain a list of issues and/or commits, they can also be based on conventional commits.
Changelogs can be rendered as plain text, Markdown, HTML and other formats are available.
How to generate a changelog
Using the UI
In the UI, a changelog can be generated from the branch page:
- select the boundaries of the changelog
- click on Change log
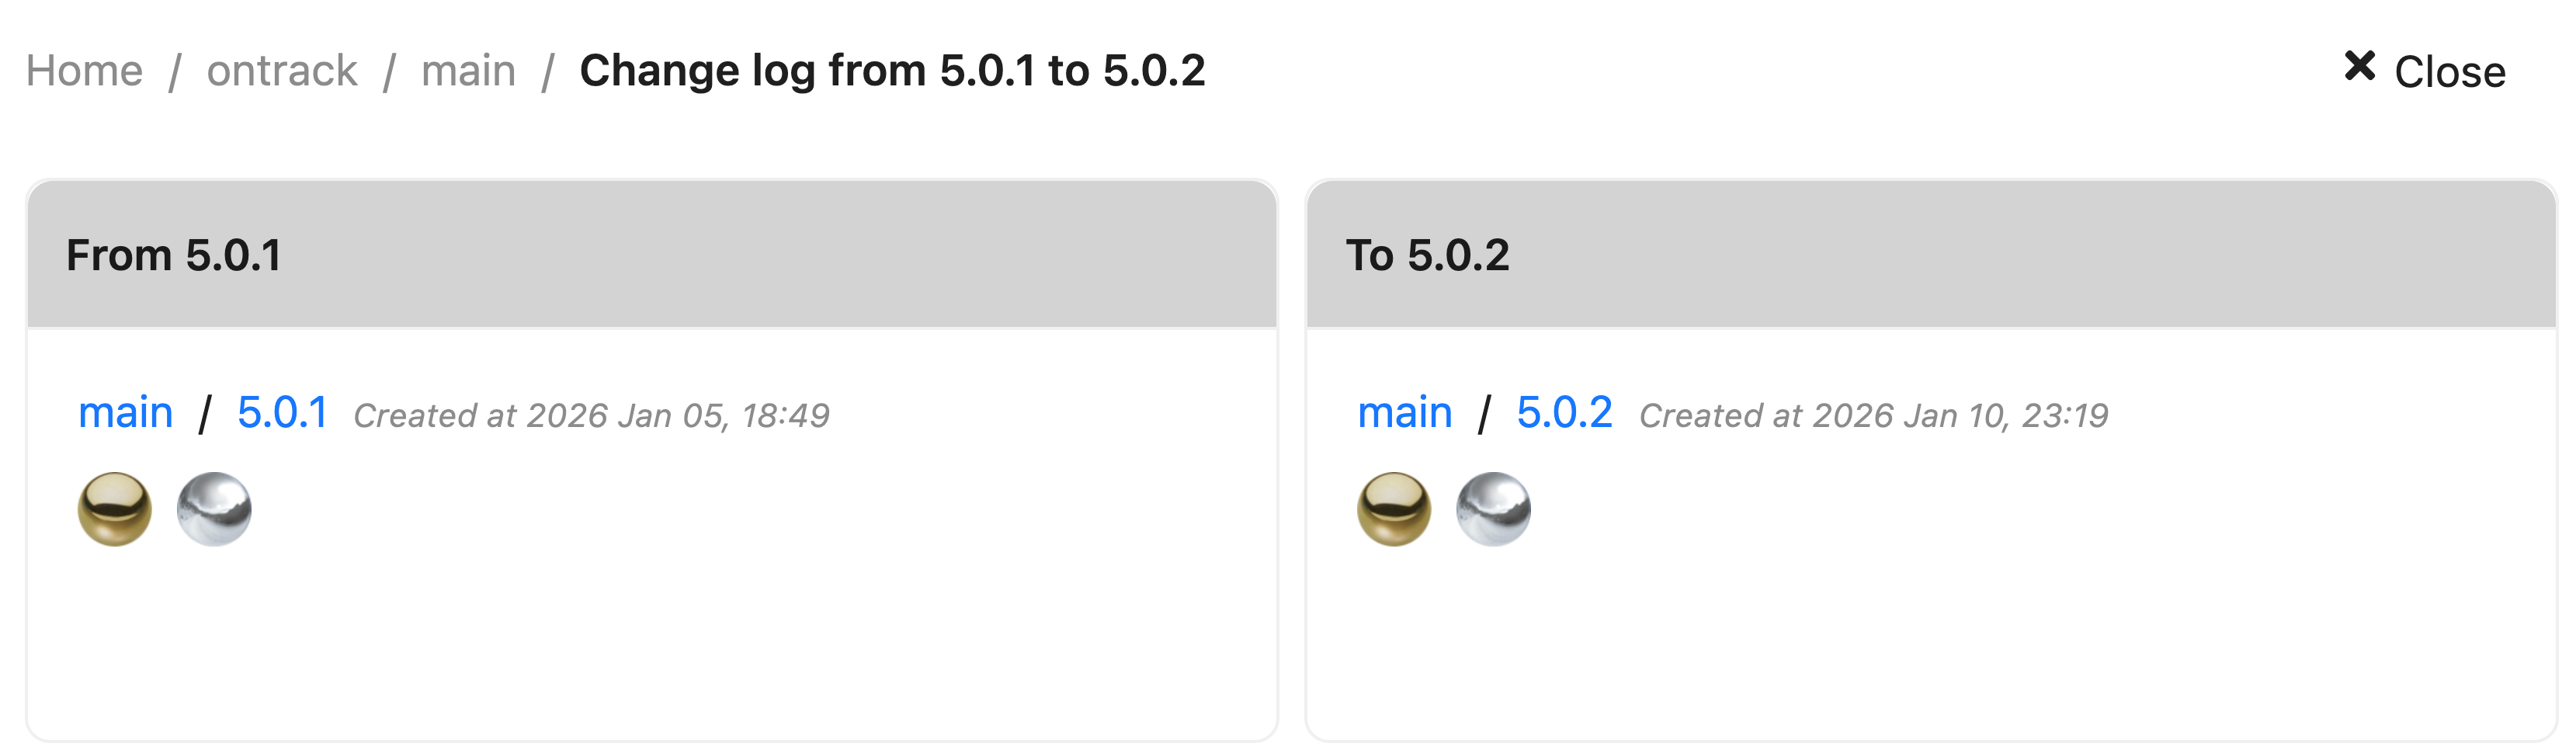
The changelog page displays several sections.
- details about the changelog boundaries:
- list of changes in known dependencies:

If a dependency has changes, you can drilldown into its own changelog.
- a list of commits for this changelog:
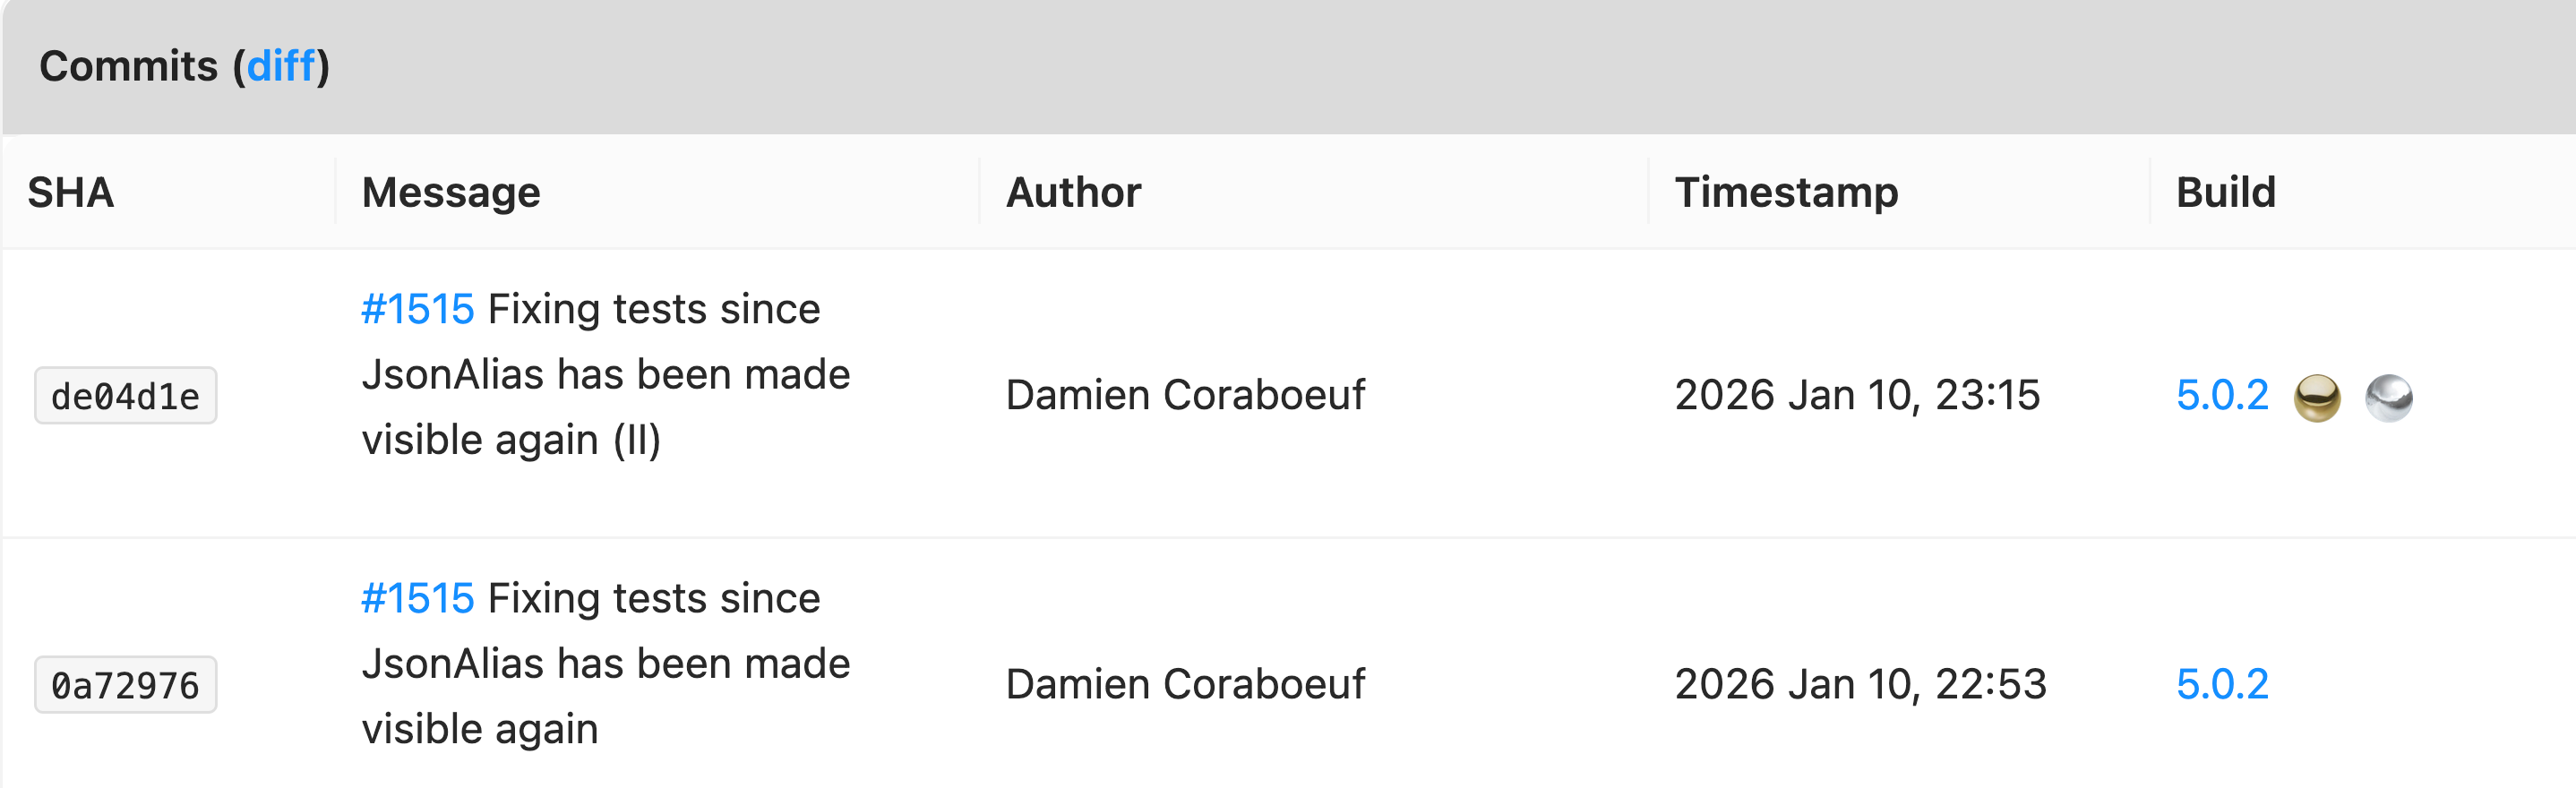
The diff links allows to drilldown into the actual diff of the commits using the associated SCM.
- a list of issues for this changelog:

The Export button allows exporting the changelog in different formats:
- HTML
- Jira
- Markdown
- Slack
- Text
Other options are also available to group the issues together.
When you finally click Export, the changelog is shown in a modal box and can be copied.
Note
See also the templating for more advanced usages
Reading the changelog as a semantic changelog
The same changelog can be read in two ways, chosen from the View menu in the page's command bar:
- Classic — the sections described above: boundaries, dependencies, commits and issues. This is what the page shows unless you ask for something else.
- Semantic — the commits grouped into sections by their conventional-commit type, exactly as the templating renderer produces them for a notification. This is the form you paste into release notes, a pull request description or Jira.
The semantic view replaces the issues section with the rendered changelog, shown as raw text with a Copy button — including for HTML, where the source is what you get, because the point of choosing a format is to paste the result somewhere else. The boundaries and the dependency changes stay: they answer which two builds this is about, whatever way you read it.
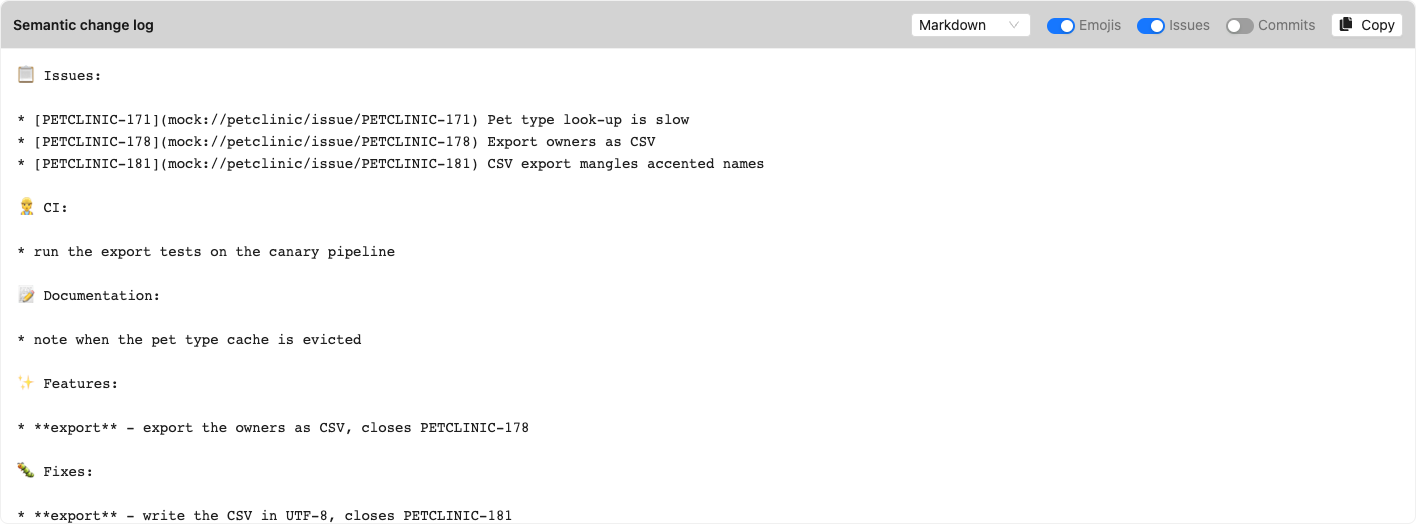
The classic view is the one shown in the sections above — the same changelog, read as boundaries, dependencies, commits and issues.
Four options sit in the panel's own header:
| Option | Default | Meaning |
|---|---|---|
| Format | markdown |
The renderer: text, markdown, html, jira or slack |
| Emojis | on | Emojis in the section titles |
| Issues | on | An issues section inside the rendered text — the semantic view has no issues panel |
| Commits | off | Shows the classic commits section beside the rendered text |
The view and its options are remembered in your user preferences, so the changelog page opens the way you last read it, on any machine.
They are also carried in the URL, so a link you share reproduces exactly what you were reading:
/extension/scm/changelog?from=1146&to=1149&view=semantic&format=jira&emojis=true&issues=true&commits=false
The parameters are written only when you change something. A changelog link with no view=
parameter keeps meaning "however you like to read it" for whoever opens it.
Note
The semantic changelog only shows commits whose subject carries a conventional-commit type,
such as feat(api): search owners by phone number. On a project whose commit messages do
not follow that convention, nothing survives that filter: with Issues off the view says so
rather than showing an empty panel, and with Issues on you get the issues section and no
type sections at all. Either way, turn Commits on to read the commits as they are. See
Semantic changelogs for the same rendering used from a template.
Using the UI across branches
You can generate a changelog between two builds on different branches.
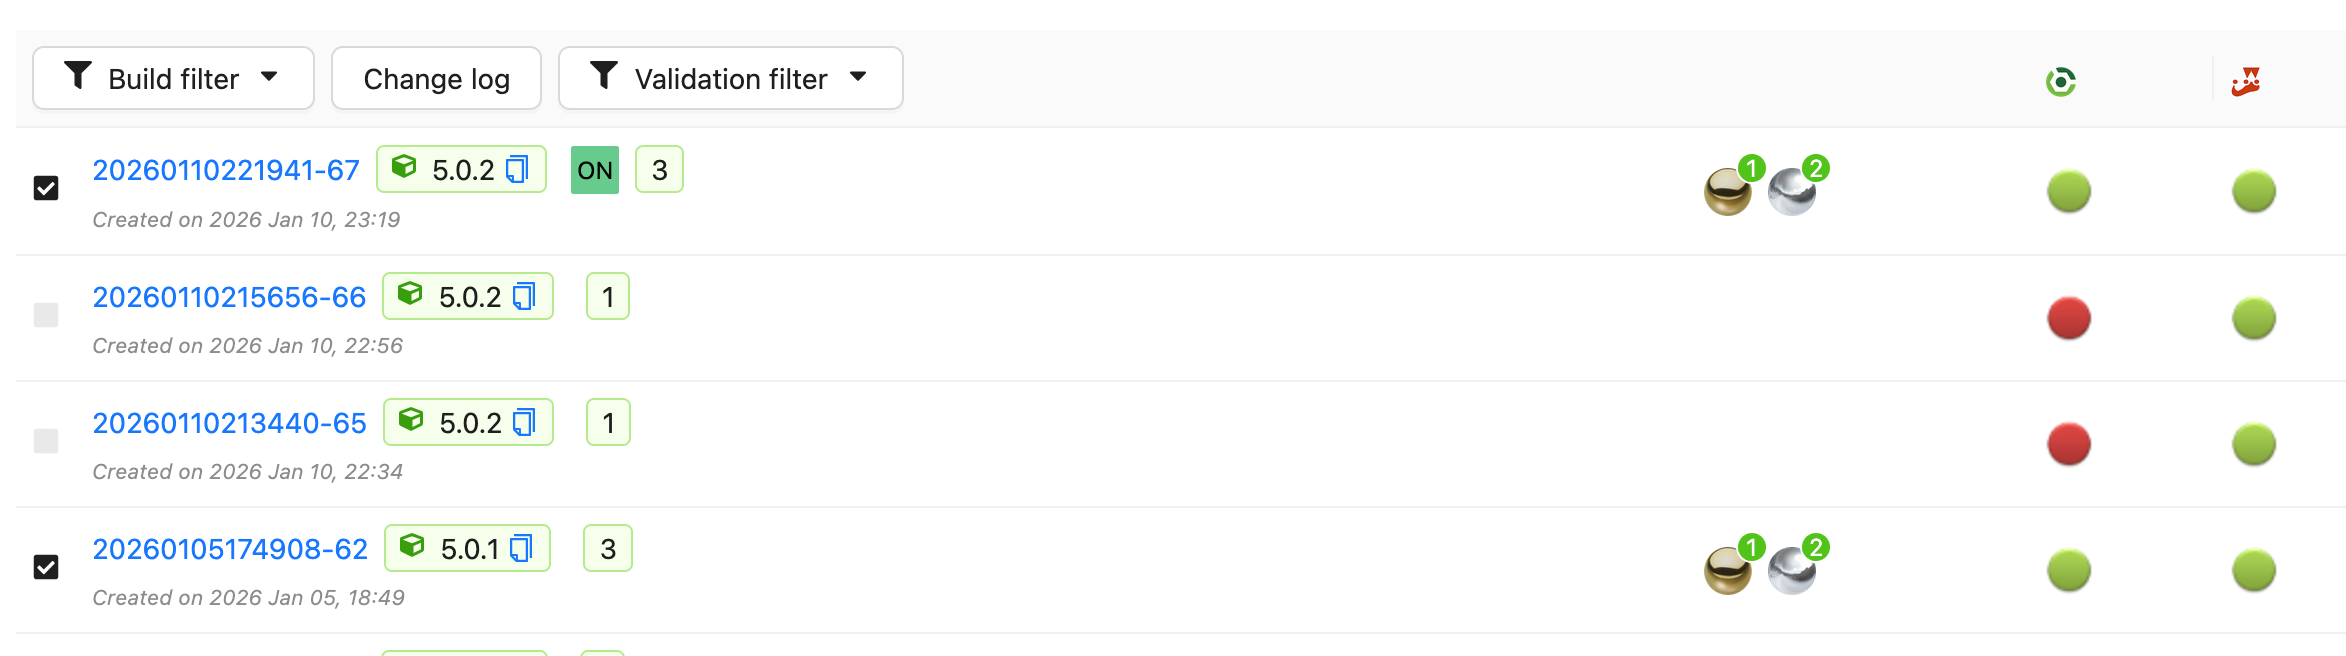
Navigate to the project and select Search builds.
Using the filter options, select the builds you want to compare, click on the icon to select the boundaries:
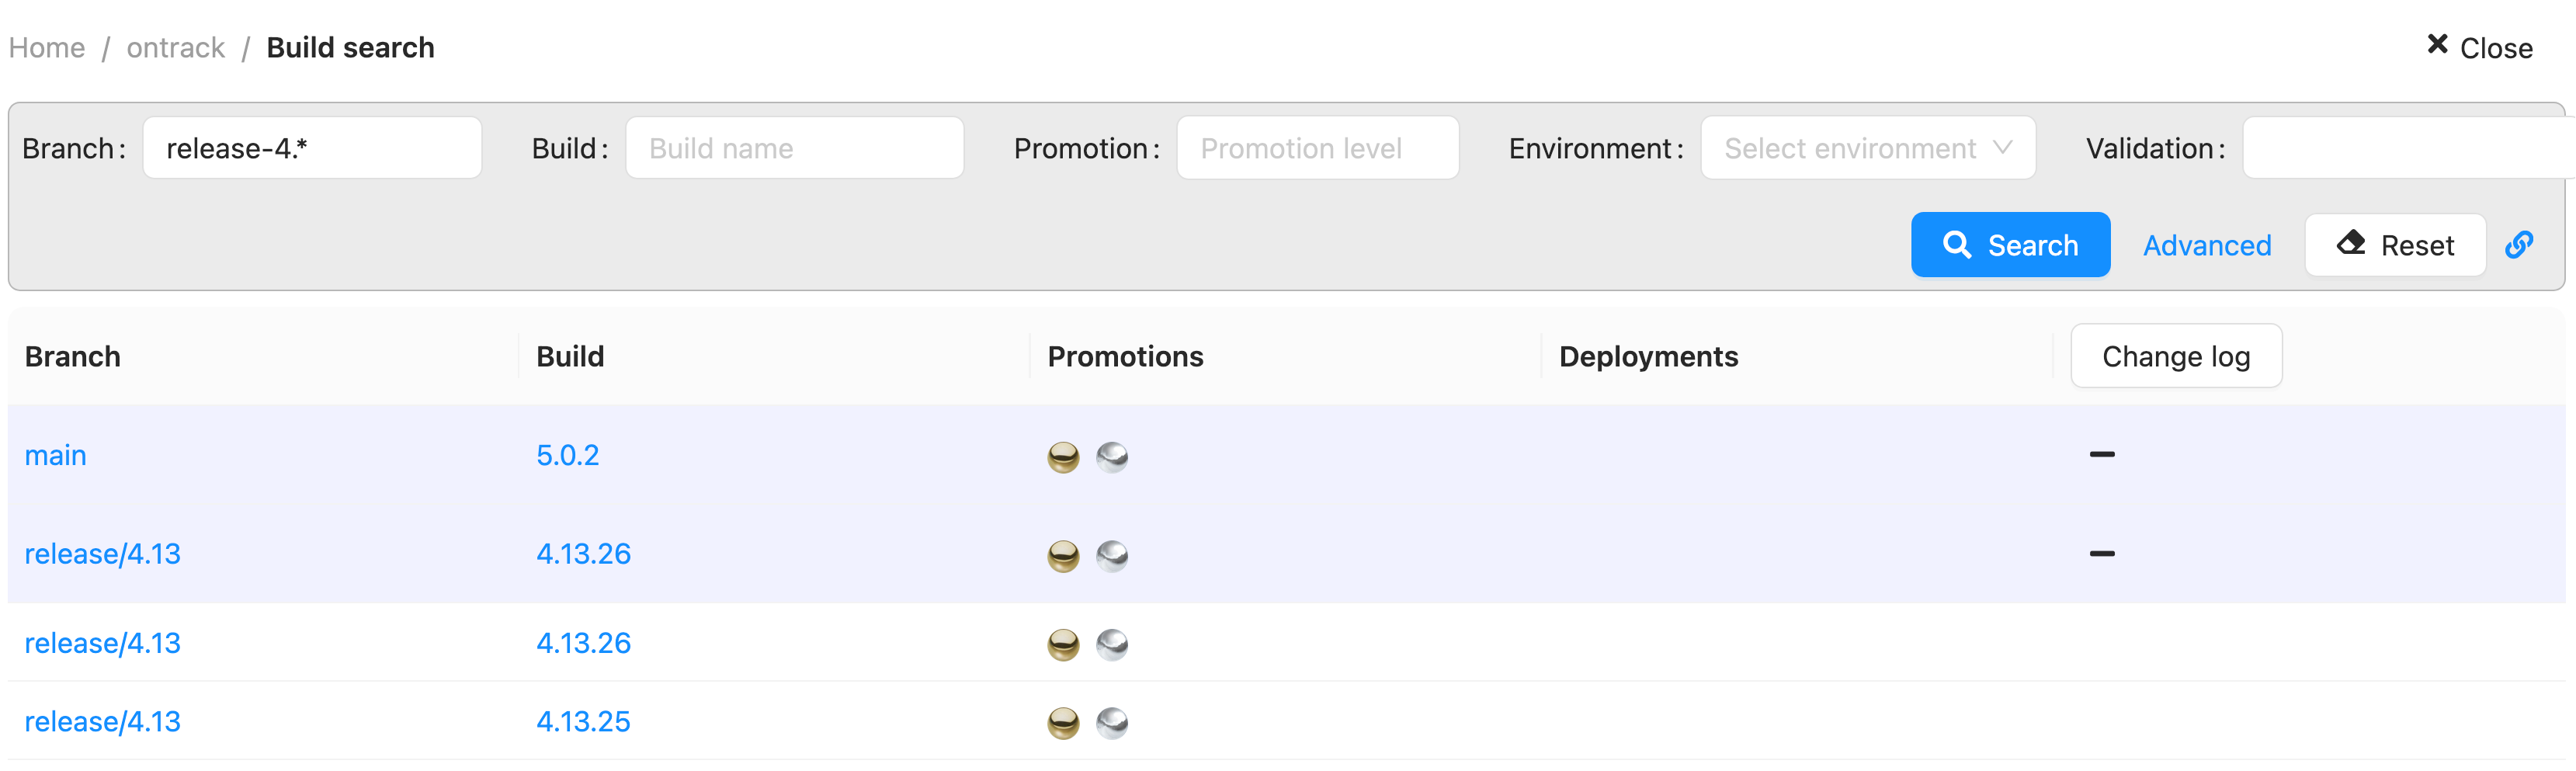
Once you have selected two boundaries, you can click on the Change log button. You'll get the same changelog page as for the branch changelog.
Note
You cannot generate changelogs between different projects.
Using a permalink
The changelog page can be linked to directly, which is useful for release notes, chat messages or CI jobs.
Using the IDs of the two builds:
/extension/scm/changelog?from=1146&to=1149
Using the name of the project and the names of the two builds, which can be written without knowing any ID:
/extension/scm/my-project/changelog?from=1.2.0&to=1.3.0
In this second form, each boundary is looked for using the display name of the builds first, and then using their name.
The boundaries can be given in any order: the changelog is always computed from the oldest build to the most recent one.
If the project, one of the branches or one of the builds cannot be found, the reason is displayed on the page.
Selecting the branch of a boundary
Build names are unique inside a branch, not inside a project. When several builds of the project match a boundary, the most recent one is used.
The branch of each boundary can be given to remove this ambiguity:
/extension/scm/my-project/changelog?from=1.2.0&fromBranch=release-1.2&to=1.3.0&toBranch=release-1.3
Warning
When a branch is given, the name of the build is looked for in this branch only, but its display name is still looked for in the whole project. A boundary given as a display name can therefore be resolved into a build which is not on the branch which has been given.
Giving a branch also changes the order of the matching: without a branch, the display name is matched first, and then the build name. With a branch, the build name is matched first, and then the display name.
Using templating
The most powerful way to generate changelogs is to use templating.
Several template sources are available:
Build.changelog- changelog between this build and anotherPromotionRun.changelog- changelog between a promoted build and the previous promotion-
PromotionRun.semanticChangelog- semantic changelog between a promoted build and the previous promotion
For example, to generate a mail on a promotion containing a semantic changelog, you could use the following template:
${promotionRun.semanticChangelog?issues=true&emojis=true}
In this example, the changelog not only contains the semantic changelog, but also the list of issues if there are any. Each section (features, fixes, etc.) is also decorated with the corresponding emoji.
Using the API
The classic and semantic changelogs can also be generated using the API:
query {
    scmChangeLog(from: 1146, to: 1149) {
        # Classic changelog
        render(config: {commitsOption: ALWAYS}, renderer: "html")
        # Semantic changelog
        semantic(config: {emojis: true}, renderer: "markdown")
    }
}
Note
Using the API directly may be a way to render more complex changelogs on your side.
Using the clients
Using the Yontrack CLI or the Jenkins pipeline library, you can generate changelogs.
Recursive changelogs
Both classic and semantic changelogs can be recursive.
The following options are available:
dependencies: comma-separated list of project links to follow one by one for a get deep change log. Each item in the list is either a project name, or a project name and qualifier separated by a colon (:)allQualifiers: loop over all qualifiers for the last level ofdependencies, including the default one. Qualifiers atdependenciestake precedencedefaultQualifierFallback: if a qualifier has no previous link, uses the default qualifier (empty) qualifier
For example, using templating, you could generate the main changelog between two builds, and then
the corresponding changelog for the library dependency:
${promotionRun.semanticChangelog?issues=true&emojis=true}

${promotionRun.semanticChangelog?issues=true&emojis=true&dependencies=library}
If the library project has a dependency on core, you can even generate a deeper changelog:
${promotionRun.semanticChangelog?issues=true&emojis=true}

${promotionRun.semanticChangelog?issues=true&emojis=true&dependencies=library}

${promotionRun.semanticChangelog?issues=true&emojis=true&dependencies=library,core}
Commit messages
Wherever a changelog renders a commit, it renders only the first line of its message - the subject - and truncates it at 100 characters, ellipsis included. Commit messages, in particular the ones written by coding agents, routinely run to dozens of lines, and a changelog is a list of subjects.
This applies to the changelog page, to the changelogs rendered through templating and the API, and to the description of a commit in the search results.
The full message is never lost: it is stored as-is, indexed in full by the search - so that looking for a phrase in the body of a commit still finds it - and displayed in full on the commit page, one click away from the changelog.
The maximum length can be changed for the changelogs rendered through templating or the API, using
the commitsMaxLength option, common to classic and semantic changelogs:
${promotionRun.changelog?commitsOption=ALWAYS&commitsMaxLength=250}
Setting commitsMaxLength to 0 disables the truncation - the subject is then rendered in full,
however long it is. It does not bring the body of the message back: only the first line is ever
rendered in a changelog.
The length used on the changelog page and in the search results is not configurable.
Configuration of changelogs
Besides the recursivity options, the two types of changelogs have their own configuration.
Classic changelogs
These changelogs display the list of issues between two builds. Optionally, the commits can be displayed as well using
the commitsOption parameter.
| Option | Type | Default value | Description |
|---|---|---|---|
| empty | String | Empty | String to use to render an empty or non existent change log |
| title | Boolean | false | Include a title for the changelog |
| commitsOption | (1) | NONE | Option to display commits |
| commitsMaxLength | Int | 100 | Maximum length of a commit message, 0 to disable the truncation |
(1) the possible values for commitsOption are:
- NONE - Never rendering the commits (the default)
- OPTIONAL - Only rendering the commits if no issue is present
- ALWAYS - Always rendering the commits (additionally to the issues)
Semantic changelogs
The semantic changelog is based on the conventional Commits
specification. The changelog page can be read this way too — see
Reading the changelog as a semantic changelog;
the options below are the ones available from a template, of which the page exposes issues and
emojis.
| Option | Type | Default value | Description |
|---|---|---|---|
| issues | Boolean | false | Must a section for changelog actual issues be present? |
| sections | List (1) | Empty | Mapping types to section titles |
| exclude | List (2) | Empty | Types to exclude from the changelog |
| emojis | Boolean | false | Use emojis in the section titles |
| commitsMaxLength | Int | 100 | Maximum length of a commit message, 0 to disable the truncation |
(1) use the sections option to redefine the title of a given semantic type. For example, if you want to use Other
for chore and Bugs for fix, you can use the following configuration:
${promotionRun.semanticChangelog?sections=chore=Other§ions=fix:Bugs}
(2) use the exclude option to exclude some semantic types from the changelog. For example, to skip the generation for
the CI & Build types:
${promotionRun.semanticChangelog?exclude=ci&exclude=build}